First let me say I have only been woodburning now for about 7 months. As I said earlier this was brought on by the families need to be able to breath fresh air again. ( lol) So I am pretty sure there are others out there that knows a lot more about this and who are a lot better, but this is about me so I will try my best to not even think about them at this moment. :)
When doing a portrait I usually ask for a very clear picture to be emailed to me or shared to me on Facebook. The picture below is my latest portrait and the original photo that I received.

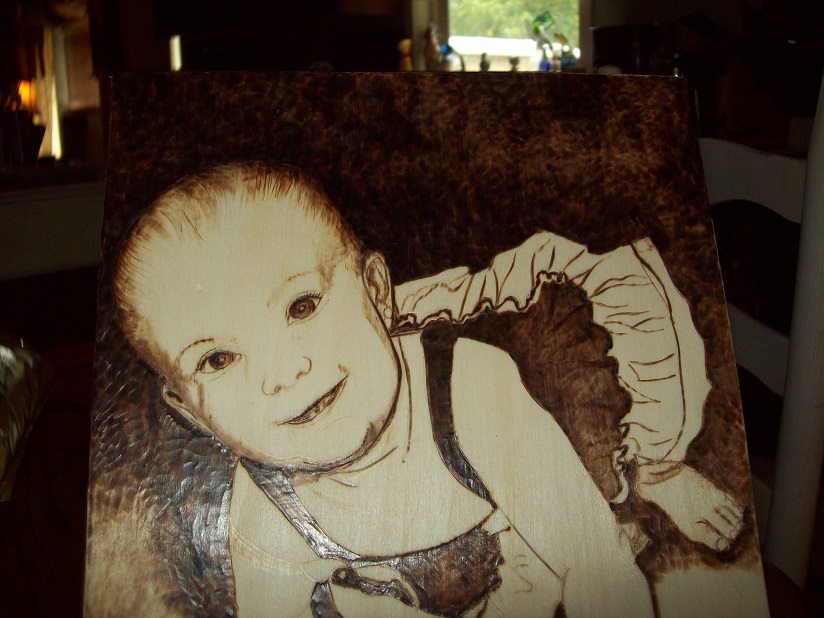
Such a sweetheart. Couldn’t you just grab some neck sugars off that little neck!
After I get the photo. I then take it into a photo program and will turn it into a black and white.
For me this is much easier to work with. However, I like having a colored picture to make references to when it comes time to do the eyes. Eyes to me really are the door to the soul and I think they can make or break a picture.
After I have my black and white picture, I print it out, and trace it to the wood that I have chosen for my portrait. Now let me mention this, there are a lot of my pictures I will hand draw, and others that I will simply burn from the image in my head. But when it comes to doing a portrait I always copy, print, and trace. First because no matter how well you try to sand after burning you will usually get a few marks that come thru, and secondly because when doing a person’s portrait you want it to be as lifelike, and true as possible.
After you trace the picture then you will outline it with your soldering iron. If you are going to do a dark black ground I usually will outline it with a heavy hand. For a light background I will very often use a cooled iron and just trace it with it. I have even used a stylist to outline a project rather than taking the chance of having a dark burned line in a place I wouldn’t want it , ( such as the nose ear,and mouth). I then will work on the face. I will do the eyes first. To me that makes the picture come alive and the rest is just a matter of filling in the blanks.
the picture you see below is of the same baby and I stopped to see if Vickie wanted the dress painted or not.. She left it up to me, so I only painted the lips with a light watercolor wash.
When using watercolors on a wood burning.. its best to seal it with before you continue on with stains.. or if you have already stained it, let it dry completely then go over the areas you want to paint and seal that before you put a sealant over the whole picture. Water paints will and do ruin. so be very careful at this stage. wash a thin line at a time and let it blend to the edge. or you will have bleeding into other areas that are very hard to sand out.
Here is where I stopped waiting for instructions as you can tell she is almost finished and grinning at us:) . The picture below is the finished portrait .
If you have any questions please don’t hesitate to ask I am always happy to help with what I maybe know or if I don’t know the answer help with a search to find the answers:)
Sharron your work is amazing! You have truly captured her bubbly personality.
ReplyDelete